

This article provides a guide on setting up a Kubernetes cluster on AWS EC2 with Minikube. You’ll learn how to create an EC2 instance, install Minikube, start the cluster, and interact with it using the
kubectlcommand-line tool. With this setup, you'll be able to develop and test applications on a Kubernetes cluster before deploying them to production environments.
Kubernetes has become the de facto standard for container orchestration, providing a powerful and flexible platform for managing containerized applications. However, setting up your first Kubernetes cluster can be daunting, especially if you’re new to the process.
Thankfully, Minikube comes to the rescue. Minikube allows you to run a single-node Kubernetes cluster locally or in a cloud instance in just a few steps, making it ideal for development and testing purposes.
Prerequisites
Before we dive into the setup process, make sure you have the following prerequisites:
An AWS account and an IAM user with access to the EC2 service.
Basic knowledge of Kubernetes concepts.
Familiarity with the command line interface (CLI).
Launching AWS EC2 instance
The first step is to create an AWS EC2 instance.
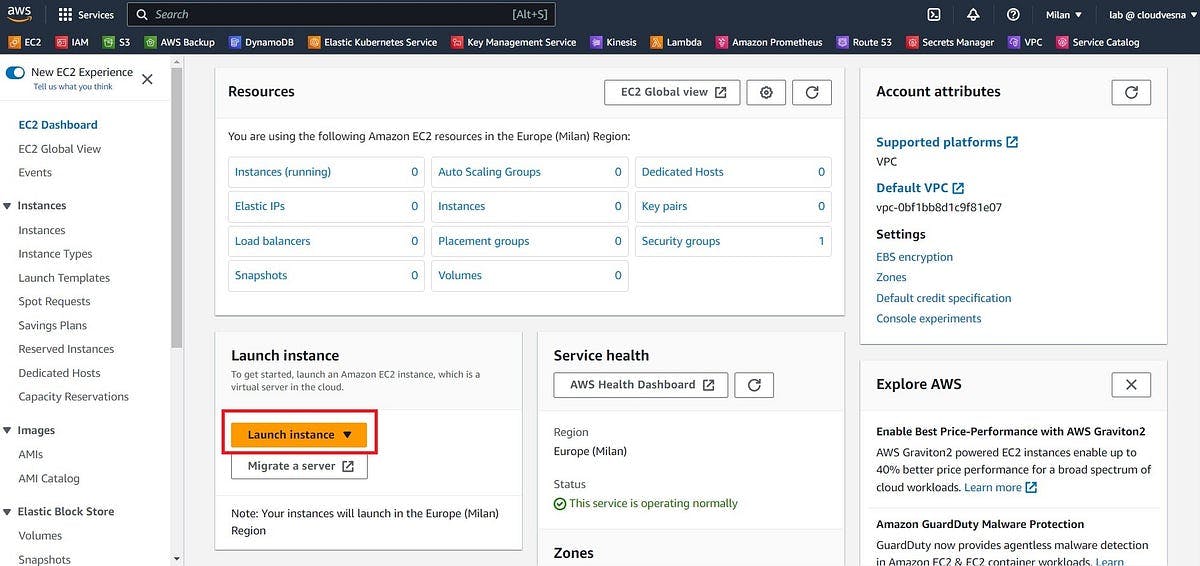
Log in to your AWS Management Console and navigate to the EC2 service.
Click on “Launch Instance” to create an EC2 instance.
- Choose an Amazon Machine Image (AMI) for your EC2 instance, for example, Ubuntu Server 22.04 LTS (HVM), SSD Volume Type.

- Select the instance type. Keep in mind that Minikube requires a minimum of 2 CPUs and 2GB of memory. I’ll use the t3.medium instance with 2 vCPUs and 4GiB memory. Using the t3.medium instance type does not fall under the Free Tier, which means it will result in charges. Make sure to stop or terminate the instance once you’re done testing to avoid unexpected costs on your AWS bill.

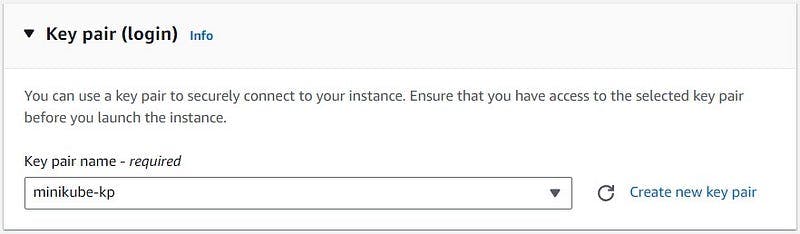
- Add an existing key pair or create a new one.
Configure the instance details including security groups, network settings, tags, etc. You can choose to retain the default configuration.
Review the instance details and click on “Launch Instance” to create the EC2 instance.
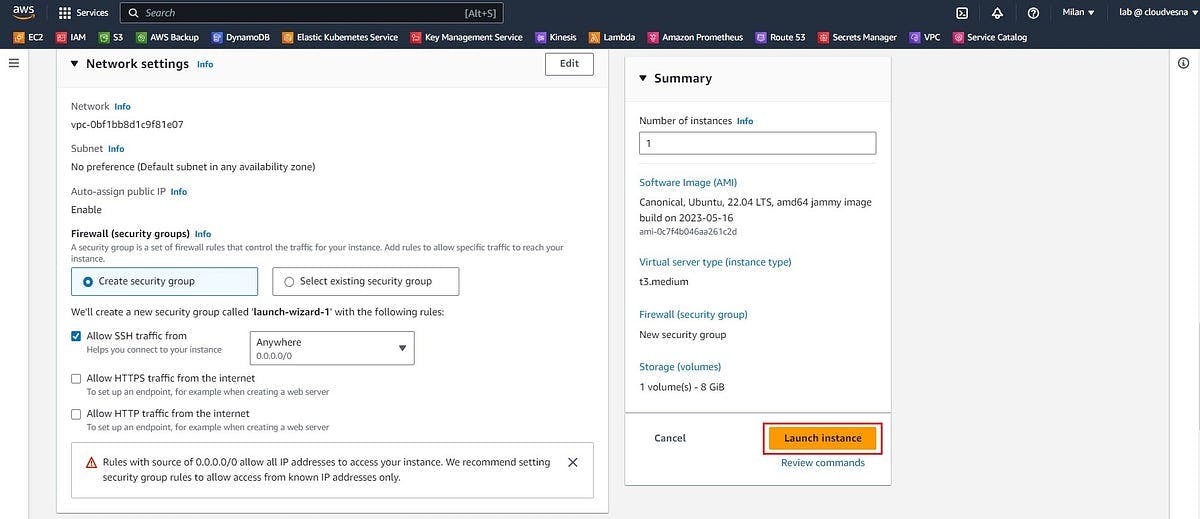
For learning/testing purposes, allow all traffic. Not recommended for production.
- Navigate to EC2 Dashboard > Instances and you’ll see your instance up and running.
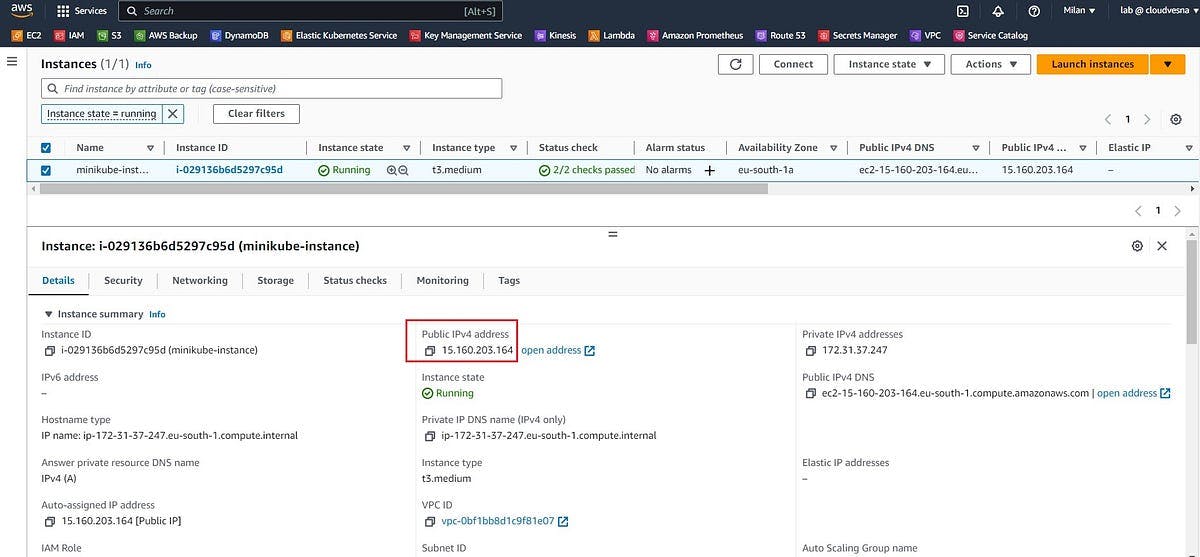
You need a public IPv4 address to connect to the instance via SSH.
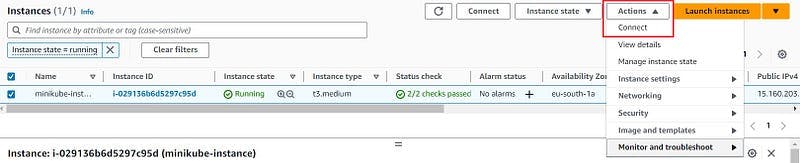
Connect to EC2 instance
To set up the Kubernetes environment, you need to install the following:
Docker
kubectl
Minikube.
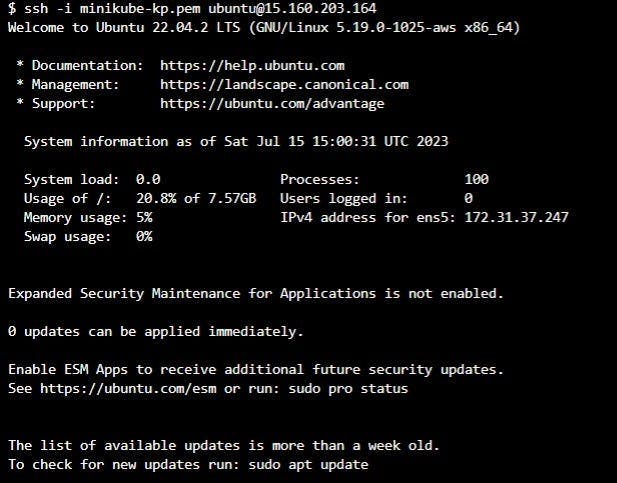
To be able to do that, we first need to connect to our cloud instance. We’ll connect via SSH. Identify the public IP address of your EC2 instance and open a new terminal.
ssh -i path/to/private_key.pem username@ec2_instance_public_ip
For example:
ssh -i minikube-kp.pem ubuntu@15.160.203.164
Note: In most cases, the guessed user name (ubuntu) is correct. However, read your AMI usage instructions to check if the AMI owner has changed the default AMI user name.
Other ways to connect:
Installing Docker
Update the packages and install Docker via CLI.
sudo apt-get update && sudo apt-get install docker.io -y
ubuntu@ip-172-31-37-247:~$ sudo apt-get update && \ sudo apt-get install docker.io -y Hit:1 http://eu-south-1.ec2.archive.ubuntu.com/ubuntu jammy InRelease Get:2 http://eu-south-1.ec2.archive.ubuntu.com/ubuntu jammy-updates InRelease [119 kB] Get:3 http://eu-south-1.ec2.archive.ubuntu.com/ubuntu jammy-backports InRelease [108 kB]
...
Setting up docker.io (20.10.21-0ubuntu1~22.04.3) ... Adding group `docker' (GID 122) ... Done. Created symlink /etc/systemd/system/multi-user.target.wants/docker.service → /lib/systemd/system/docker.service. Created symlink /etc/systemd/system/sockets.target.wants/docker.socket → /lib/systemd/system/docker.socket. Processing triggers for dbus (1.12.20-2ubuntu4.1) ... Processing triggers for man-db (2.10.2-1) ... Scanning processes... Scanning linux images...
Running kernel seems to be up-to-date.
No services need to be restarted.
No containers need to be restarted.
No user sessions are running outdated binaries.
No VM guests are running outdated hypervisor (qemu) binaries on this host.
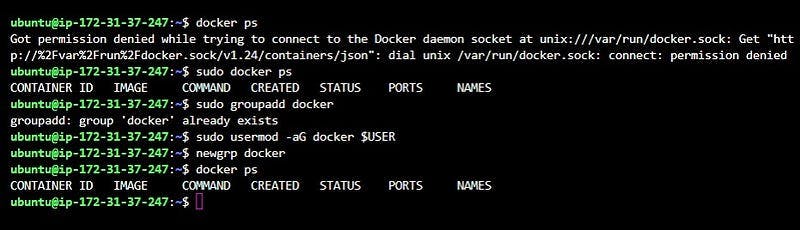
Troubleshooting: You might get the following error after installing Docker.

This is a common error when trying to manage Docker as a non-root user.
By default it’s the
rootuser that owns the Unix socket, and other users can only access it usingsudo. The Docker daemon always runs as therootuser. If you don’t want to preface thedockercommand withsudo, create a Unix group calleddockerand add users to it.
- Create a
dockergroup. It’s likely that this group already exists.
sudo groupadd docker
- Add your user to the
dockergroup.
sudo usermod -aG docker $USER
- Activate the changes to the groups.
newgrp docker
Installing kubectl
kubectl is the Kubernetes command-line tool that allows you to run commands against Kubernetes clusters. You can use kubectl to deploy applications, inspect and manage cluster resources, and more.
- Download the latest release (x86–64).
curl -LO "https://dl.k8s.io/release/$(curl -L -s https://dl.k8s.io/release/stable.txt)/bin/linux/amd64/kubectl"
- Validate the binary (optional).
curl -LO "https://dl.k8s.io/$(curl -L -s https://dl.k8s.io/release/stable.txt)/bin/linux/amd64/kubectl.sha256" echo "$(cat kubectl.sha256) kubectl" | sha256sum --check
- Install kubectl.
sudo install -o root -g root -m 0755 kubectl /usr/local/bin/kubectl
- Verify the installation.
Installing Minikube
Minikube allows you to run Kubernetes on your local machine or in a cloud instance by deploying a simple cluster with one node. Here’s how you can install Minikube on your AWS EC2 instance:
curl -LO https://storage.googleapis.com/minikube/releases/latest/minikube-linux-amd64sudo install minikube-linux-amd64 /usr/local/bin/minikube
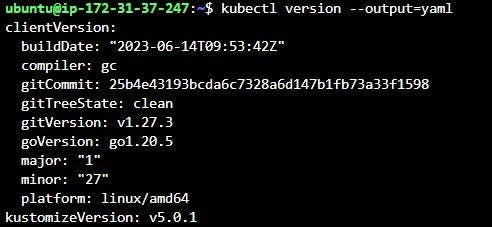
That’s it. Now you have all the tools you need. To check the version you installed, run minikube version.
Starting and stopping your cluster
To start your cluster, simply run minikube start.

To check the status of your cluster, run minikube status.

To stop a running cluster, run minikube stop. To pause Kubernetes, run minikube pause.

Interacting with the cluster
You can use kubectl to manage pods, services, and other Kubernetes resources. For example,
- list all pods in all namespaces
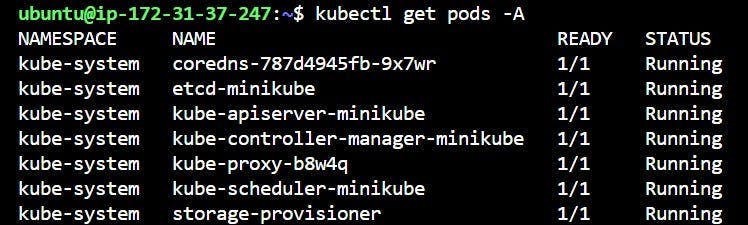
- list all nodes (Remember minikube runs a single-node Kubernetes cluster.)

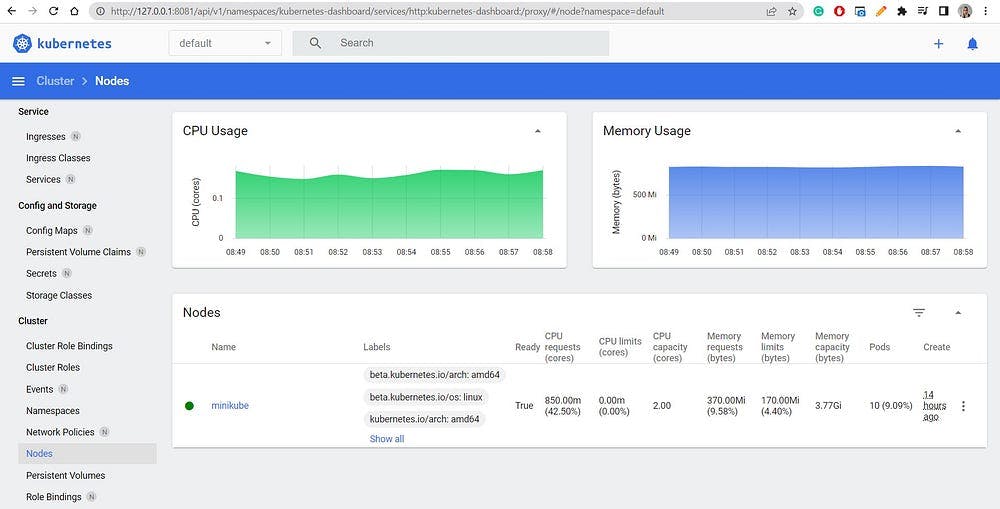
Kubernetes Dashboard
To access the Kubernetes Dashboard locally, we need to create an SSH tunnel. The basic syntax for creating an SSH tunnel is as follows:
ssh -i [private_key.pem] -L [local_port]:localhost:[remote_port] [username]@[remote_host]
- Display the Kubernetes dashboard URL.
minikube dashboard --url
- Open a new terminal and create an SSH tunnel.

Terminal 1: Find the Kubernetes dashboard URL running within the minikube cluster Terminal 2: SSH tunnel
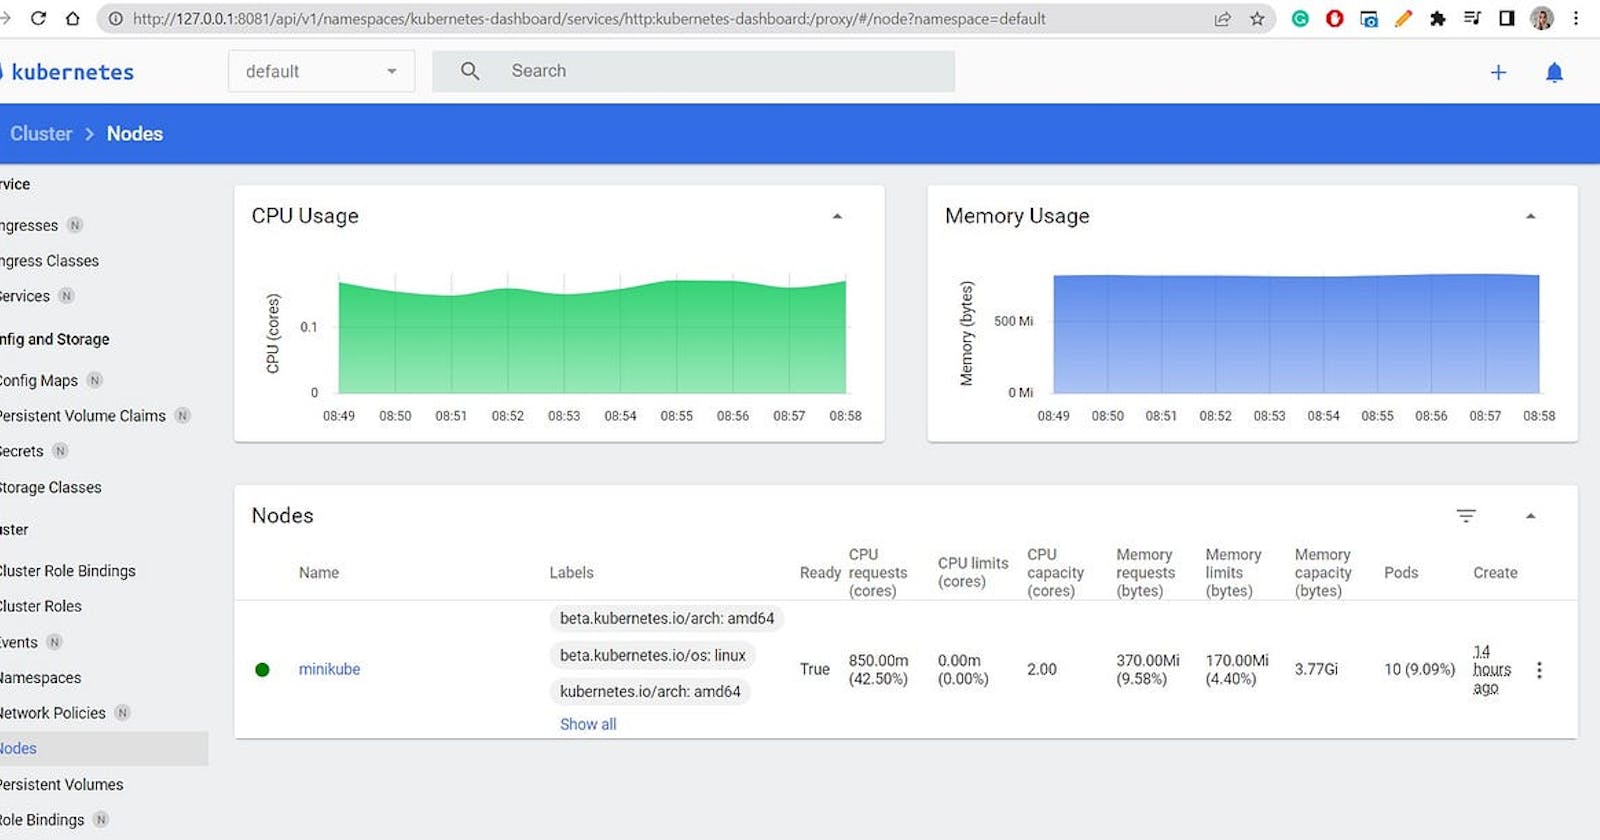
- Open your browser, and replace the minikube dashboard remote port with the local port.
http://127.0.0.1:8081/api/v1/namespaces/kubernetes-dashboard/services/http:kubernetes-dashboard:/proxy/
Congratulations! You have successfully set up a Kubernetes cluster on your AWS EC2 instance with Minikube.
Next Steps: Now that your Kubernetes environment is up and running on AWS EC2 with Minikube, you can deploy your applications, scale deployments, monitor, manage secrets, and more.
Additional Resources
Thank you for taking the time to read my article! If you found it valuable, I invite you to follow my Hashnode blog and subscribe to the newsletter for similar content in the future.